Showing posts with label small homemade gifts. Show all posts

Monday, August 27, 2012

Handmade card making..my way!

I made HAND MADE cards a bit different than most. I have a few stamps..but since my supplies are limited..I use what I have on hand. Usually stickers...scrap booking paper...ribbons and this n that.

However..THIS time, I tried a new design ORIGINAL by ME...

I LOVE Hydrangeas..and cut out a photo of one I had taken awhile back..I had dried this one for display. When I finished the card and stood back..

I was soo amazed how three dimensional 3D it appeared!!

Let me know if you think so? Or am I wishing I see something unique!


This one a little different take on same idea.


This is another one made for a friend's birthday. She loved it. Made me HAPPY! Just using stickers...ribbon and I also LOVE using DOILIES for crafting.


Nice to be back to uploading and sharing new craft adventures and more.

Next..my NEW Sewing room addition!

Blessings from the HEART
HOPE

Saturday, November 19, 2011

Gifts and Goodies


I love giving gifts...and it does not have to be a special time of year..just a gift of LOVE..created from the HEART.

I made this HOME MADE sugar scrub..and it is marvelous!!!


I had so much fun making up this jar for a gift to a dear friend. Actually an Evangelist wife, who is always on the road and could use a little pampering time!

The SPOON...came from one of those teeny tiny...CUTE..little ice cream cups! I had saved one and VOILA...perfect for this little jar to scoop up a gallop and pamper oneself!! I also experimented with a PAPER COASTER DOILIE for under the lid and it worked perfectly..as if made for it! A little ribbon and there you have it...A Creative Heart...homemade gift.


A gift sent to a blogging friend... "Good Morning Mary Sunshine"...her's is of course the one with the swirly colors and SUNSHINE smile button to match her personality!


This is a favorite GINGER BREAD cake that makes everyone ask for more!

I decorated it with a simple CAN..yes, I did!! of creamy Butter Creme Frosting! Sprinkled with Cinnamon. I could not believe how good it tasted. I was impressed this time with Betty Crocker! You go GIRL!


HAPPY THANKSGIVING TO ALL MY FRIENDS HERE!!

HOPE

Thursday, July 28, 2011

Coffe Cozy!!


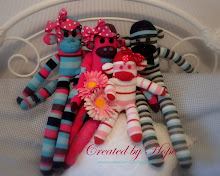
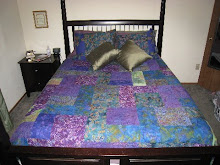
In the mean time...while I'm working on my quilted bed runner. I thought you might like to see a FINISHED project I did a while back.
Great gifts for your Coffee Lovin friends and family!

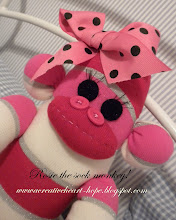
My first attempt was using a famous drive in "M" Coffee cup! Matched the fabric color! I love their Mocha Frappe' with lots of whip cream!


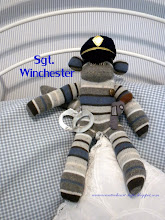
For my Brother in law Dave...on his birthday.


I saw something similar to these on a blog an decided to try my own!! I saved a STARBUCKS cardboard coffee cozy for a pattern and began my "creative" journey!!


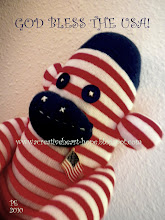
and these for my mom and sister...who meet often at the coffee shoppe. Now they can pull out their very own COFFEE COZY!!! oooh la la...


I traced a pattern onto colored card stock. Wrote "my" directions on the top. The LOOP you see, is for placement of....a STRETCH PONYTAIL holder!! Yep...frugal me! Buy them at the $ store and your all set. I recently bought a batch of various colors to go with the fabrics. Instead of just black.


I also purchased at the grocer...disposable coffee cups with lids for the gift presentation. The cozies actually go on "upside down"...so you need this to show how they actually fit on the cup. They do not slide either!!!
My cardboard cozy from the coffee shoppe would always slip.


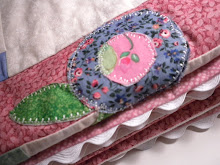
I sandwiched the top piece with batting. On this cozy, I did a row of two quilted lines on (front) each side. You can use an overall quilting pattern as well..whatever YOU like! Nice option!!


I then placed the stretchy pony tail holder facing INSIDE as a loop (cut the size you want) for stretch over a button. The stretch can be long as I found it then fits various size cups. USE ONE LOOP. The other side will have a button on the front. As seem above in the "gift" photo.

Sew the back and front (right sides together) and leave an opening (one the side)..NOT near the edge)..for turning. When you turn...the loop should be on one side.


SUPPLIES..a Fat Quarter of fabric will make several...or scraps that fit the pattern piece. Cotton batting, pony tail holder...thread...and disposable coffee cup w/lid and your all set to begin your own COFFEE COZY JOURNEY!!


This is actually my practise cozy...love the leather button on this one!

They are also great for those very COLD slushes and stainless coffee holders that can be too hot or cold to handle.


Then stitch opening...and add your choice of button with shank...so loop can go over button.

VOILA... c'est fini!!

HOPE

Monday, August 9, 2010

Mini Bag TUTORIAL


For those who requested the tutorial...I hope these instructions are clear for you! ENJOY!!

Supplies needed...Sewing machine...fabric...PELLON...thread...zipper.
(note on fabric..do not use flimsy fabric!!) 100% Cotton is ideal.


Cut your fabric to your own desired size...making TWO squares...make sure the ZIPPER is longer in length. I'll explain as we go.

After cutting your TWO SQUARES...cut PELLON the same SIZE and iron onto the WRONG SIDE of EACH square of fabric. This makes the fabric nice and stiff. Iron with a pressing cloth over your fabric to prevent sticking. You can use another piece of fabric, or a small washcloth.


Once ironed take ONE SQUARE and fold down TOP EDGE of fabric 1/4" and press...then place one side of ZIPPER under fabric as shown and sew close to edge. Now do the other side and it should look like the photo on the right.

Once this is done OPEN THE ZIPPER half way! Important so you can turn it inside out once sewn!!


NOW...you are going to sew all around the bag...as shown...OVER the ZIPPER (I sew back over this area twice for strength). The zipper should be sticking out...you will be cutting this part off! Yeppers..you can actually cut the zipper and it'll still work!!! CUT OFF the Zipper ends near fabric edge.


NEXT...IRON the seams open as shown and lay the SEAM flat so that you have the point as shown laying on the bed of your sewing machine (as in photo)...sew across...this makes the bottom of the bag corner squared. (notice I use the edge of my plate as a guide)


Your bag should look like this...(sorry for the messy seams...I made this in a hurry to see if I could do it quickly for one of my craft classes)PROOF..it is QUICK!


Turn inside out...and the bottom should look like this...


...VOILA.....FINISHED ZIPPERED BAG!!!

(please let me know if you have need further help...or let me know if yours was a success!!)

HOPE

Monday, January 18, 2010

SURPRISE ..sock monkey!


This little guy was made for my sweet Grandson Stephen. He is the name-sake of my son Stephen (read Watering Wells Of Hope). His dad, Charlie, is an Army Firefighter.

I was so excited when I found this cute outfit ...that fit PERFECT!When I looked over my sock COLLECTION! (huge grin) These colors just popped out as a Firefighter..NOW..if only I could find...FIREFIGHTER clothing...his size. Guess where...yep! the infamous DOLLAR STORE!! and sooo CUTE!

I really was beside myself...

hope no body in the store noticed...

......with all my jumping up and down in delight!!


Here he is as just FRANKIE...


I couldn't decide on the right buttons for him..and chose the silver, I guess because of the grey in the color scheme...wasn't too sure I liked it...

BUT WHEN...I found that outfit...with the SILVER fabric on the ax ..and the hose!...WELL..NOW YOU KNOW...why I was beside myself with good reason!


Did you notice..his little crooked grin!!

I enjoyed putting little Frankie together..and now on the search for not only socks..but now embellishments. WHO knows..who is next!

More..sock monkey's to come...

HOPE